
Early morning, catch the bus to work or school. You know exactly how she feels.
Except it’s the weekend! Woo! No going to school or work!

I was there too
Early morning, catch the bus to work or school. You know exactly how she feels.
Except it’s the weekend! Woo! No going to school or work!
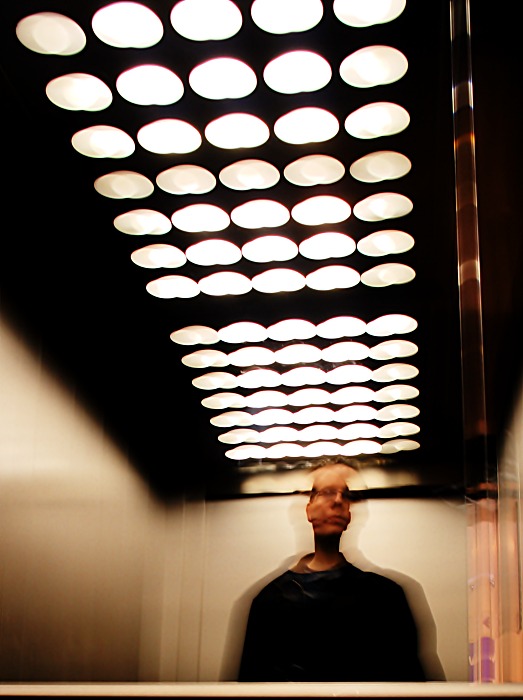
Pictured in the elevator of the new Ballincollig shopping center.
What kind of bird is this? Around a dozen congregate around our bird feeders, dive to the ground and bath in the bowl of water below, and even fight over how gets to have a bath or a feed sometimes!
| Aperture | ƒ/6.3 |
| Camera | Canon EOS 20D |
| Focal length | 300mm |
| ISO | 200 |
| Shutter speed | 1/25s |
In this post I’m going to show you how to go post-process this image:
By the end, we’ll have an image that looks like this:
This tutorial was created using the GIMP, but it’s equally applicable to your favourite editing software as long as it has the same tools. Photoshop, and other editing software should work equally well.
The steps described here are worth practising, and will apply equally well to any portrait!
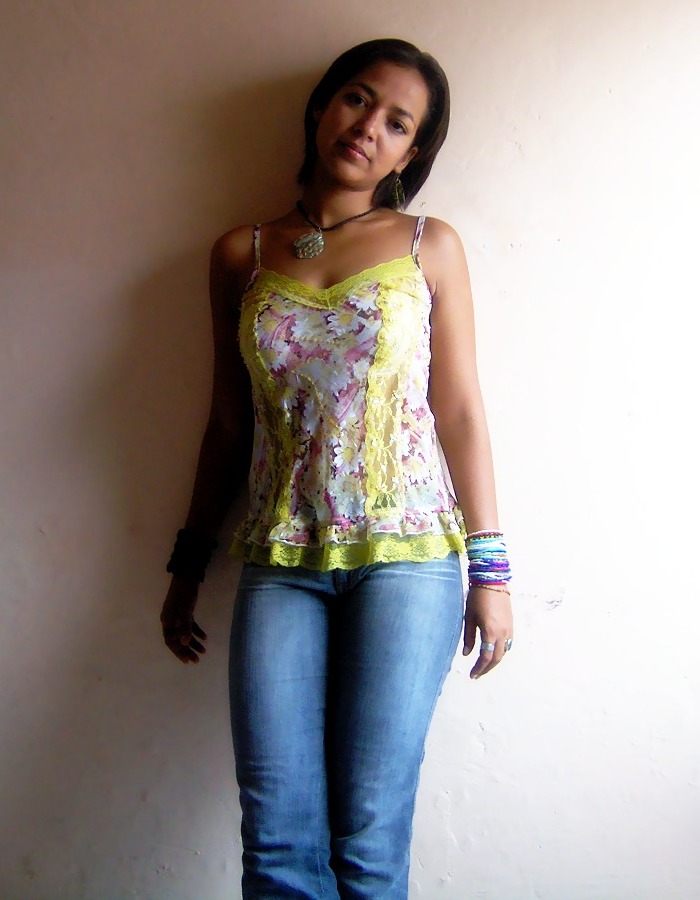
First of all, I came across this photo on Flickr through my contacts page. Here’s the original photo, and Ayhtnic kindly let me use her image.
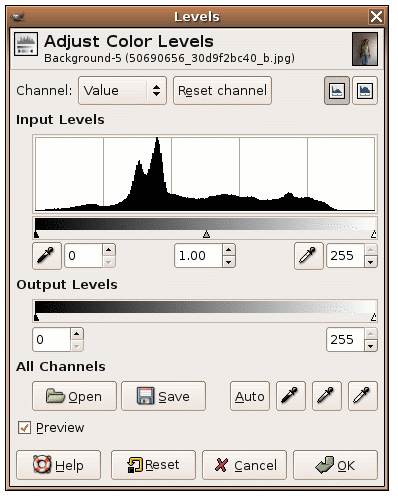
After you load the image, the first thing to do is use Auto Levels from the Layer->Colors menu. This tool alone does wonders for most photos, especially if they’ve been captured as Jpeg straight from the camera.
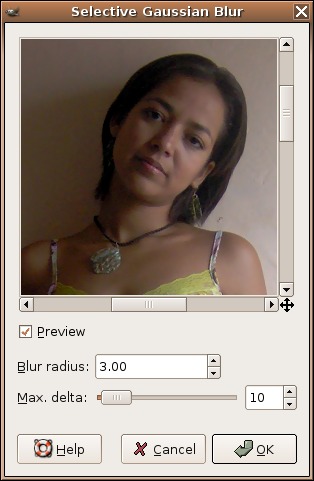
The image is a little noisy so let’s clean it up a bit. Use Selective Gaussian Blur from the Filters->Blur menu. Use small values as we just want to smudge the noise away without losing too much detail. A radius of 3, and delta of 10 worked fairly well here.
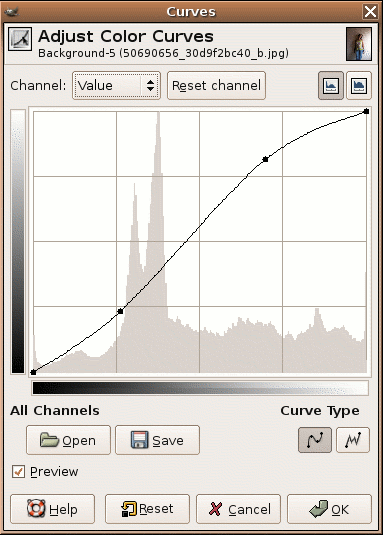
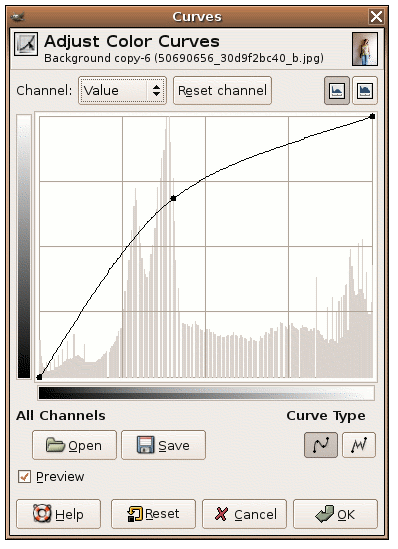
Let’s brighten it a bit and add contrast. Use the Curves tool from Layers->Colors for this. The classic “S” shape always adds life to a photo.
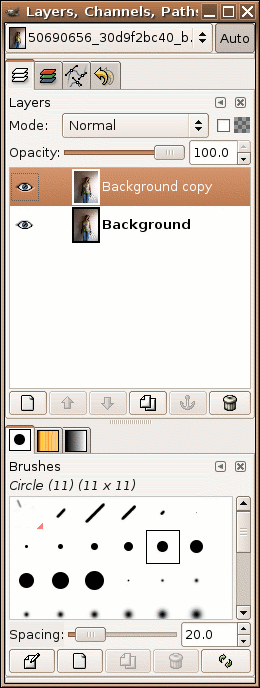
Open the Layers dialog and duplicate the background layer.
Select the new layer (called “background copy” here) and use the Curves tool again to brighten this layer a lot.
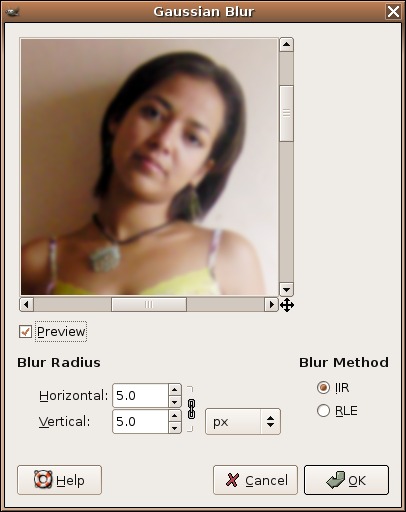
With the same layer selected (the top one, the “background copy”), we’ll apply some blur. Open up the Gaussian Blur tool, it’s in Filters->Blur. Apply a blur of 5 pixels to the top layer. Don’t worry, we’re not finished!
We’re going to change the “mode” of the top layer now. With the top layer selected, click on the dropdown box that says “Normal” and scroll down to “Soft Light”. You can also try other modes, they’ll make for interesting photos!
Notice how the image suddenly changed?
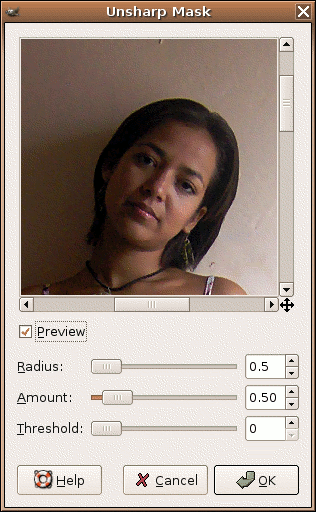
Even with the nice glowing effect, the image looks indistinct. Let’s sharpen the bottom layer. Select that layer in the Layers dialogue and load the “Unsharp Mask” filter. This is in Filters->Enhance->Unsharp Mask.
Don’t apply too much sharpening. Make it subtle. The settings in the screenshot work well.
All that’s left is to save the image, save it with a quality setting of 92%. Don’t bother with higher, as it’s practically impossible to see any difference in quality.

Young boy admiring the graffitti on a van.
The van was used to transport ramps and tools for the skateboarders in Emmett Square, Cork.
| Aperture | ƒ/9 |
| Camera | Canon EOS 20D |
| Focal length | 18mm |
| ISO | 100 |
| Shutter speed | 1/200s |
Here’s a good article describing what you should take with you while hiking and how to take it too. The idea of charging batteries from a solar panel sitting on your backpack is cute!
Here’s a very impressive New York Panorama via Daily Web Thing. Nice!
What are your options when you don’t run Windows or Mac and/or don’t want to use proprietary software?
Niklas Saers covers some of the options in this blog post. Thanks to him, I learned about ISO Noise Reduction, a GIMP plugin, which I’ll give a try tomorrow.
I usually use DCAM Noise, or selective blur to remove offending pixels but that can leave awful looking smooth areas next to unsightly pixels.
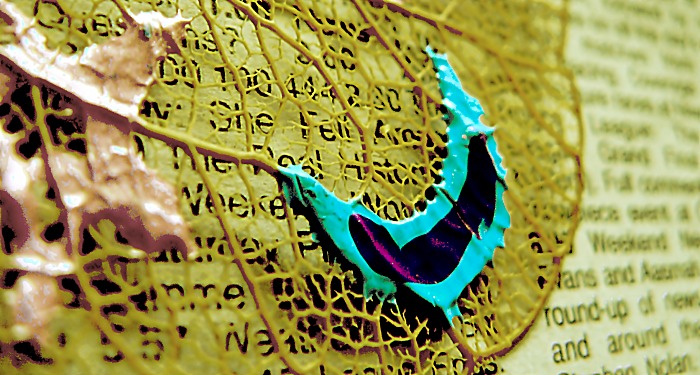
Detail from a decorative earring, laid out on a newspaper.
| Aperture | ƒ/2.8 |
| Camera | DMC-FZ5 |
| Focal length | 6mm |
| ISO | 200 |
| Shutter speed | 1/8s |
Interesting thread on the EOS forums on stock photography websites.
I’m a member of both Shutterstock and I Stock Photo but I haven’t been very persistent in uploading photos.
After all the trouble one goes to to become a member it’s worth remembering to upload stuff sometimes!


