
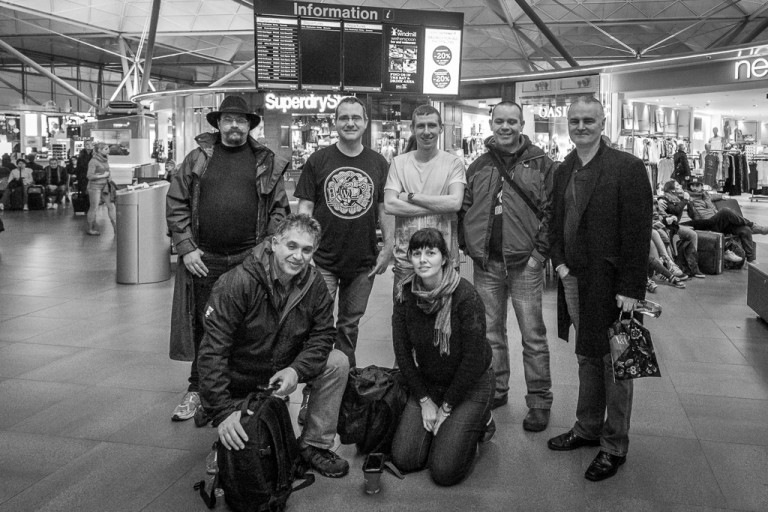


Cork Street Photographers go to London
A number of Cork street photographers travelled to London on Saturday to photograph the populace of this sprawling metropolis. If you don’t know, Cork is a city in Ireland, home to roughly 400,000 people and served by an international airport where flights to London in the UK take a little over an hour or so….
How to develop an underexposed photo in Lightroom
https://videopress.com/v/tyBy0av9 I had fun rescuing this really underexposed landscape photo in Lightroom. It’s a photo of Kilcrea Friary in Co Cork and I went out there one September evening in 2015 with a few others from Blarney Photography Club to shoot the sunset. I remember the day was somewhat cloudy so I hoped there would…
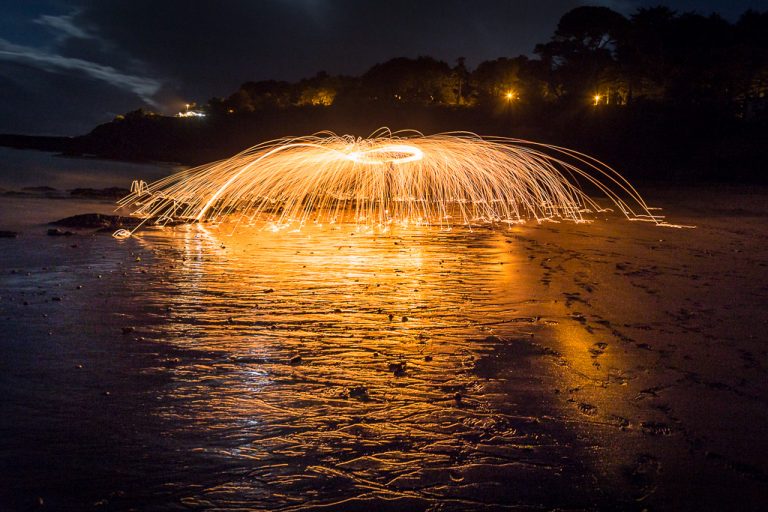
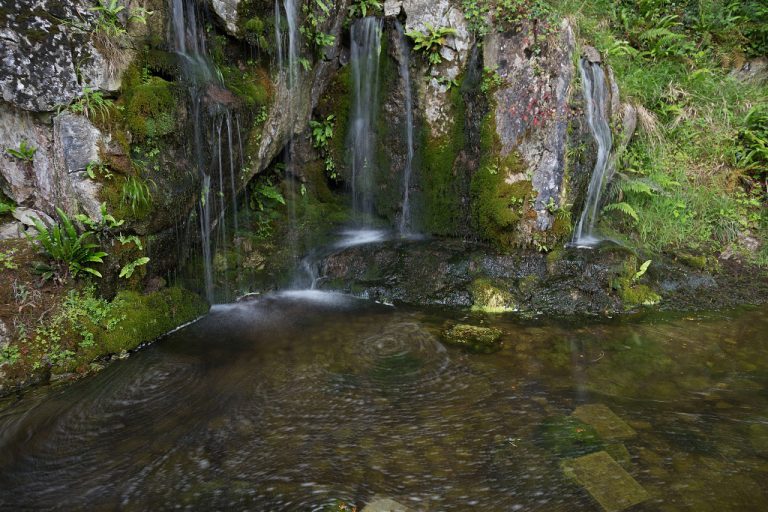
More fun with long exposure stacking of photos
A few months ago I experimented with Imagemagick by using it to merge very similar photos of flowing water to give the impression of a longer exposure. Here are a few more examples. By merging a series of thirty photos taken two seconds apart I created a pleasing image that looks like a sixty second…
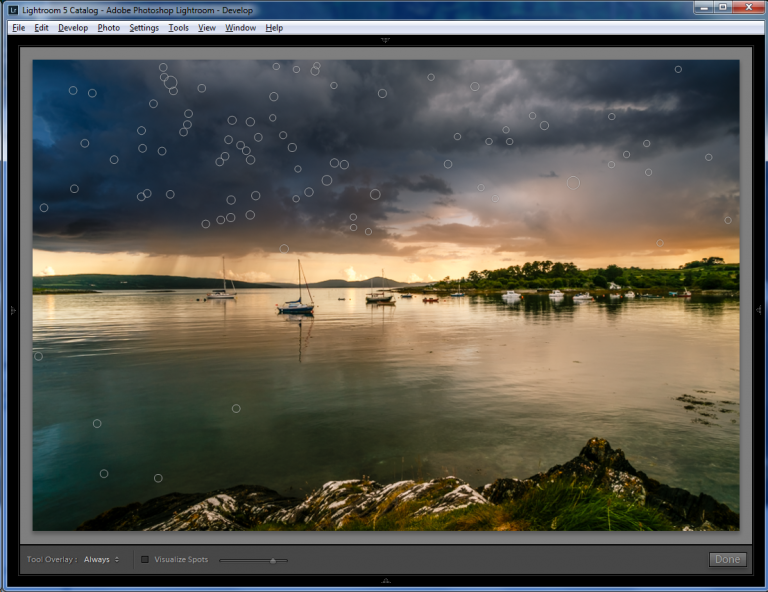
Lightroom Tips and Videos
At the recent Automattic Grand Meetup in Utah I presented a Lightroom tutorial. During the course of the tutorial I went through the various Develop panels explaining what (most of) the sliders did, offering some advice sometimes on how to use them. Here’s a few tips from the night and links you’ll find useful: Use…
Use Back Button Focus to Pre Focus
Sometimes it’s useful if the shutter button doesn’t focus. Instead you press another button to focus. I’ve used it in the past when shooting street photography (focus on the ground and I know anything a metre away will be in focus), and at night on a tripod when taking long exposure shots of moving lights….
How to clean your camera sensor
One of the horrors of owning a DSLR and using multiple lenses is the dread of getting dust on the camera sensor. In small amounts it’s visible whenever you shoot using a small aperture like f/22 but if you leave it go too long you’ll see round smudges show up on your every day snaps…
Long Exposure Photography through Stacking
The usual way of taking long exposure photos is by leaving the shutter open for a long time. This requires either a dark location or ND filters of some sort on the end of your lens. There is another way and that’s called image stacking. In a nutshell, you take a series of well exposed…
Use Lightroom Collections to Publish Photos
Since I started posting photos online I’ve always created two images: A web sized version to go online. A full size version for my archive. This has served me well as I have from time to time changed the software I use to develop photos. Otherwise, I might have the web version and not be…
Shoot manual mode with E-TTL flash just once
If you have an external flash (and this even applies to the onboard flash but that’s a lot weaker) for your DSLR try shooting with the camera in manual mode and let the flash light the scene for you. Canon flash units use E-TTL to figure out what power to use, Nikon and other manufacturers…
Save instead of Export in GIMP 2.8
Version 2.8 of GIMP saves images as .xcf files by default when you hit CTRL-S. I remember a development version did this years ago but it was reversed before final release due to user feedback AFAIR. I can understand the reasoning behind this decision but I hate it. It really, really bugs me. I don’t…