
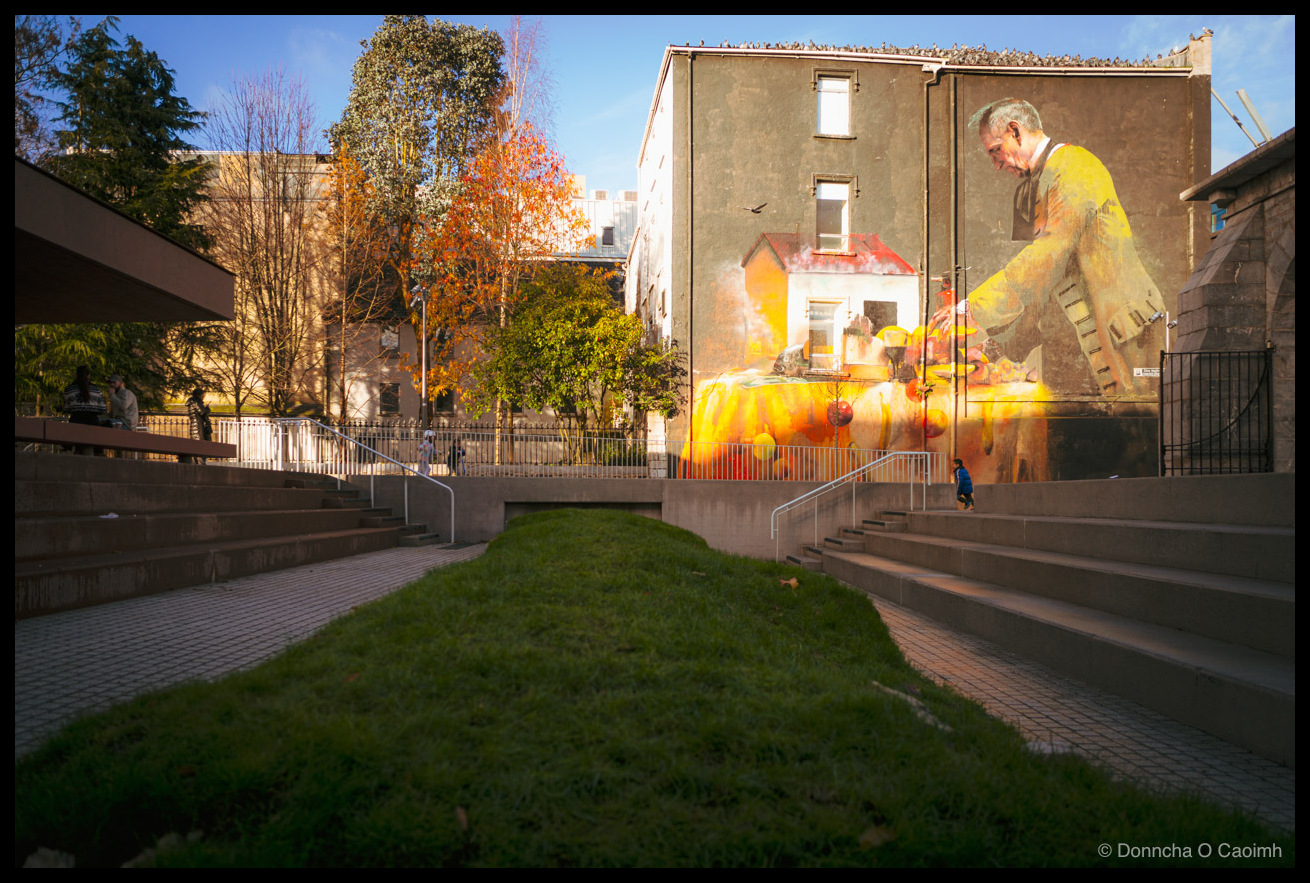


A Sunlit Afternoon on the Wall
This is me standing on the old walls of Cork where I took this photo in Bishop Lucey Park yesterday afternoon. The sun had already started to head to the horizon and it wasn’t even 3pm, but it did light up the mural on the wall and placed the ground in front of me in…
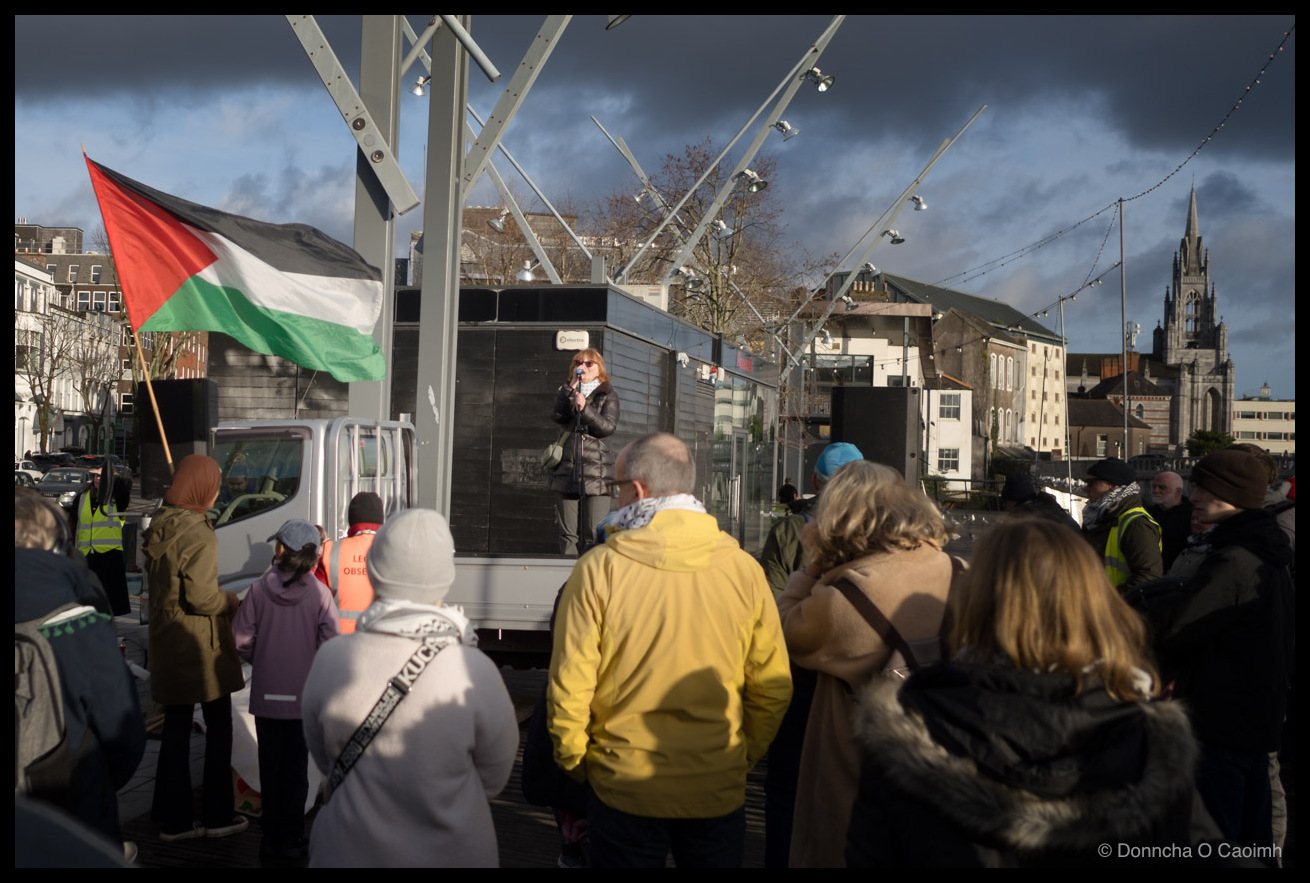
Palestinian Rally in Cork
Today was International Day of Solidarity with the Palestinian People, and it being Saturday there was another rally supporting the Palestinian people and Gaza in Cork. It went from Grand Parade, down St. Patrick’s Street and up Oliver Plunkett Street, finishing up on Grand Parade again, at the corner with South Mall, along the river.
Airborne at Dawstown
A horse flies through the air following another horse at the Dawstown Point to Point earlier this year.
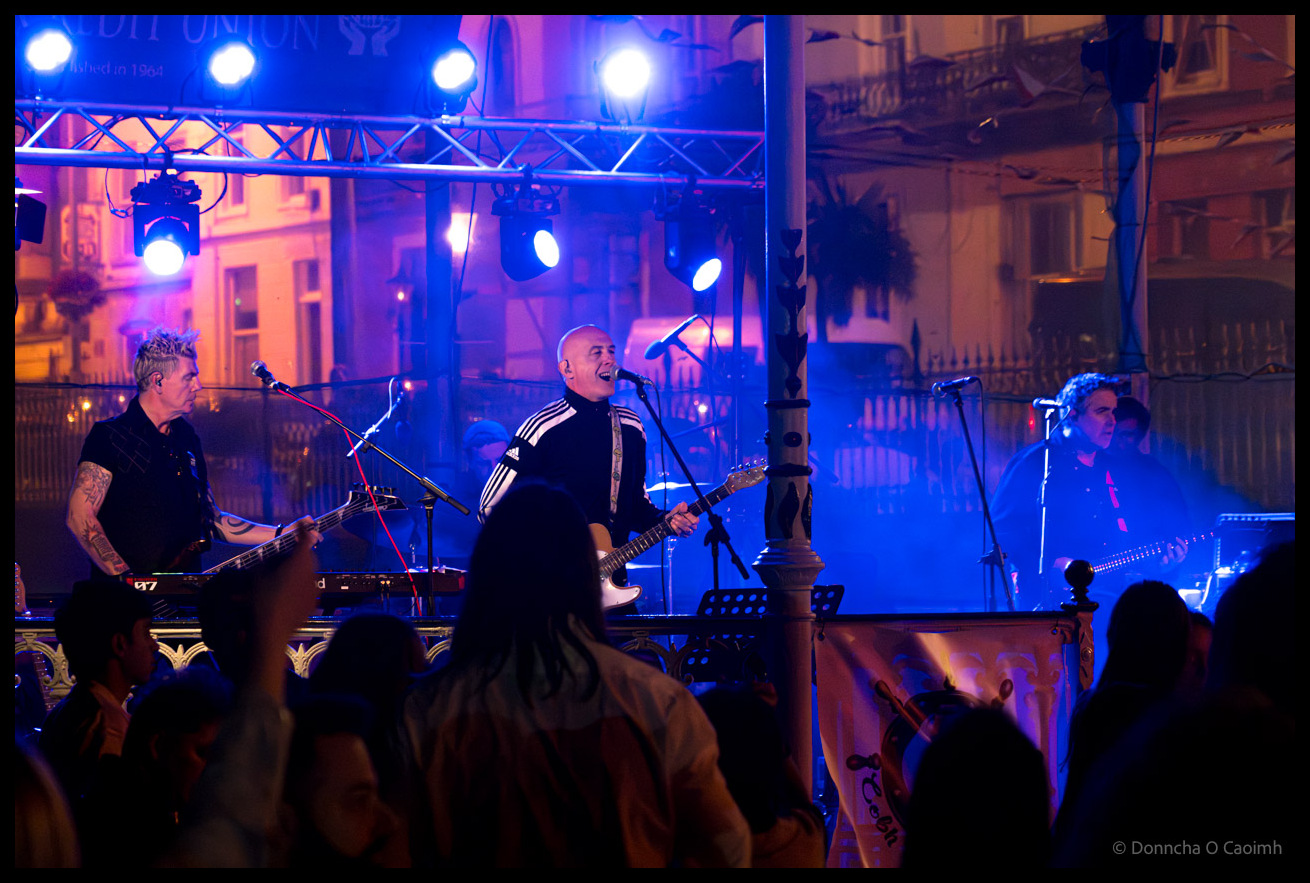
Big Generator: Cobh’s Night Electric
Big Generator rocked Cobh last August during the Cobh People’s Regatta. They played in the band stand in the park and even later in the evening after the fireworks there was a large crowd dancing and enjoying the music! Look out for them as they play around the country.
The Perfect Angle
A selfie at Cork Pride last August on Kennedy Quay. I wonder if this selfie is on Instagram somewhere?
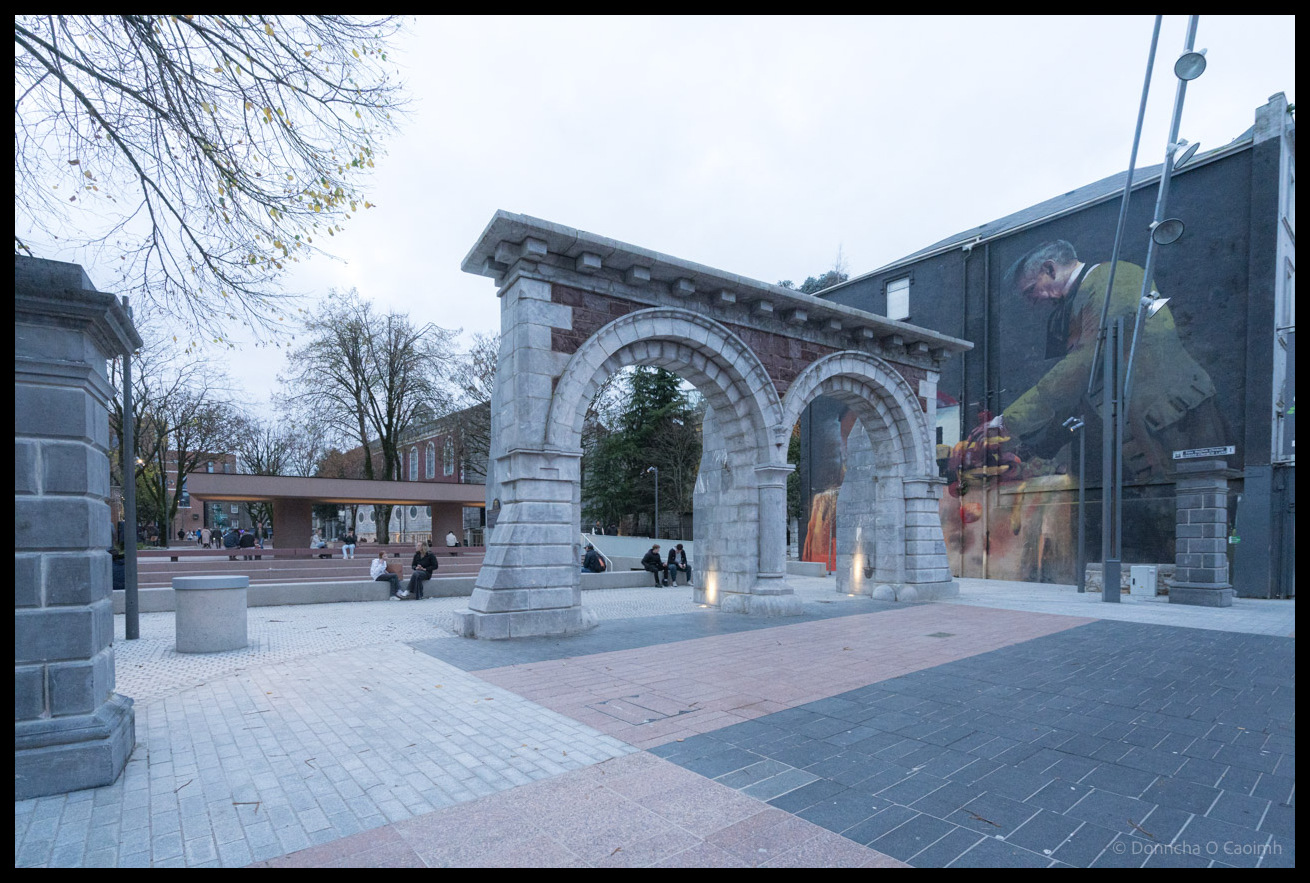
The new Bishop Lucey Park
I’m not a big fan of brown, and there’s a lot of brown in the new Bishop Lucey Park. I do really like what they did with the old wall. That’s the slightly rough-looking grass bit in the second picture of my gallery. The old park had this cut off from the public behind railings,…
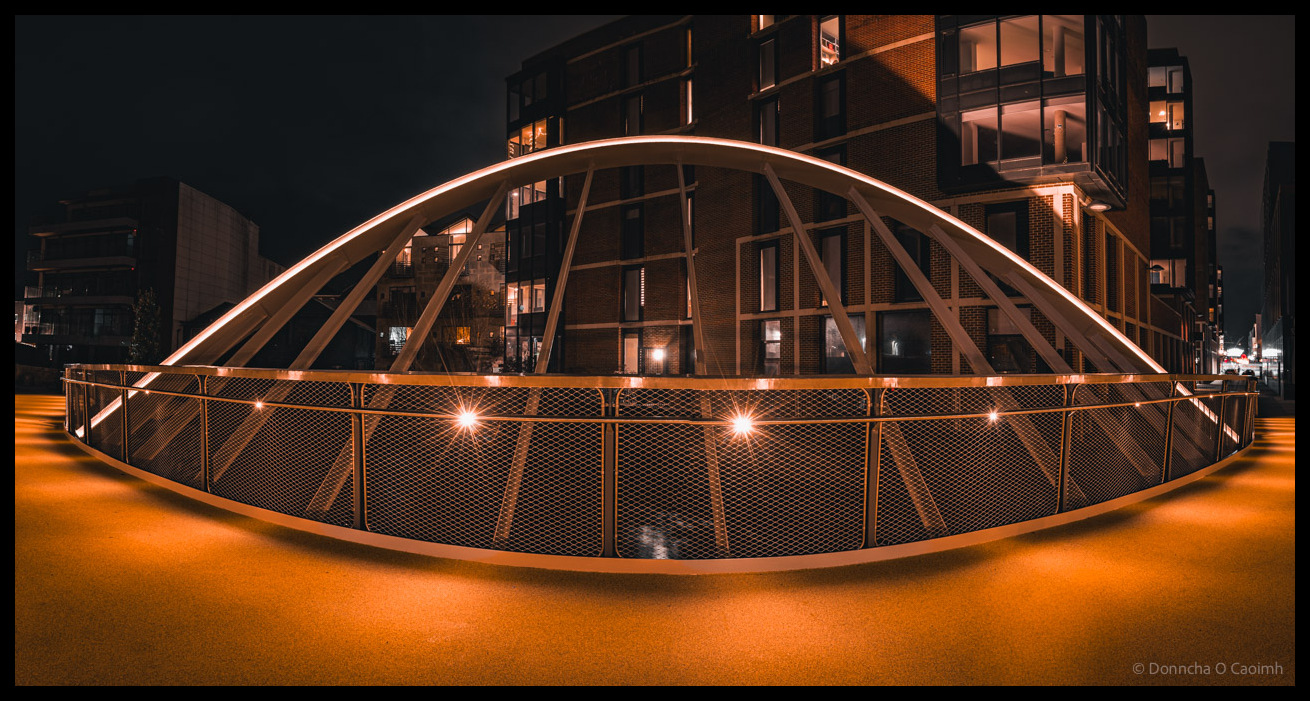
A Bridge to Wandesford Quay
Cork’s newest bridge is a new pedestrian or cycle bridge that spans the River Lee from Wandesford Quay to Lambley’s Lane. You’d be forgiven if you’re not familiar with either area, as they aren’t exactly the most trafficked areas in the city. If you’re curious, Lambley’s Lane is off to the side of the old…
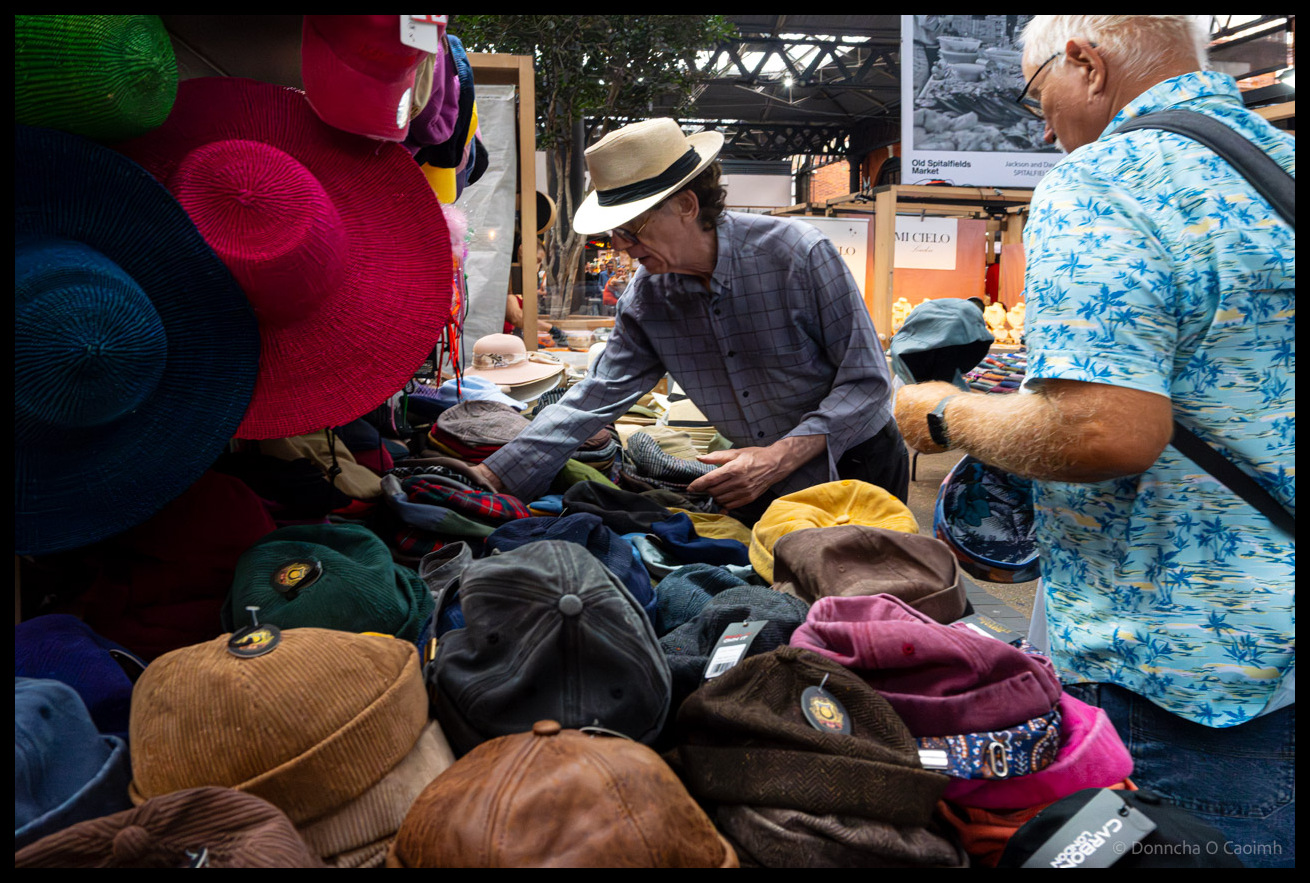
London Market Trading in Full Swing
A slice of life in Spitalfields Market, London, last July. If you want a hat, go to the guy wearing a hat!
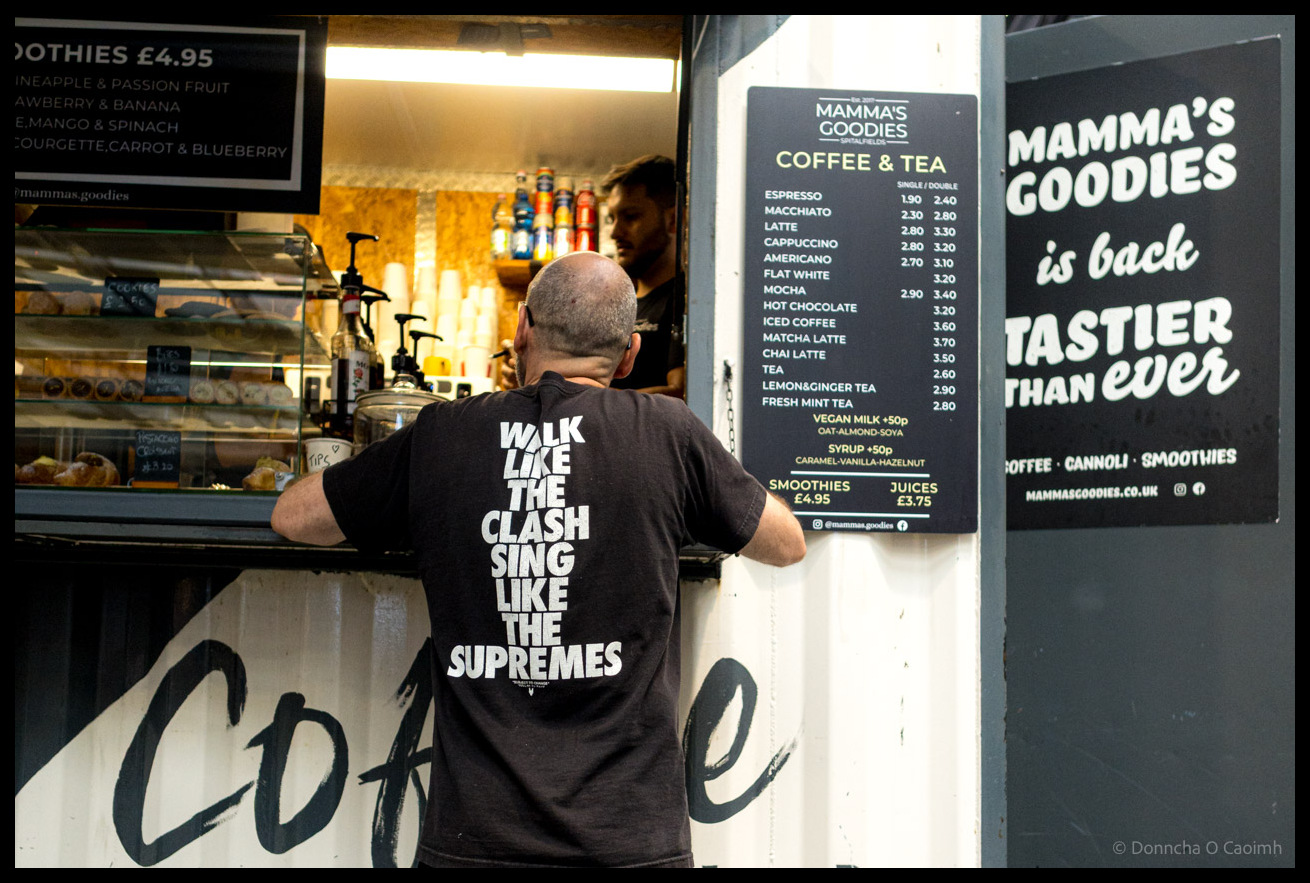
The Clash Meets Coffee Culture
I never imagined I’d see a T-shirt that features The Clash and The Supremes in one sentence, yet here we are in Spitalfields Market in London. Good coffee at Mamma’s Goodies too!
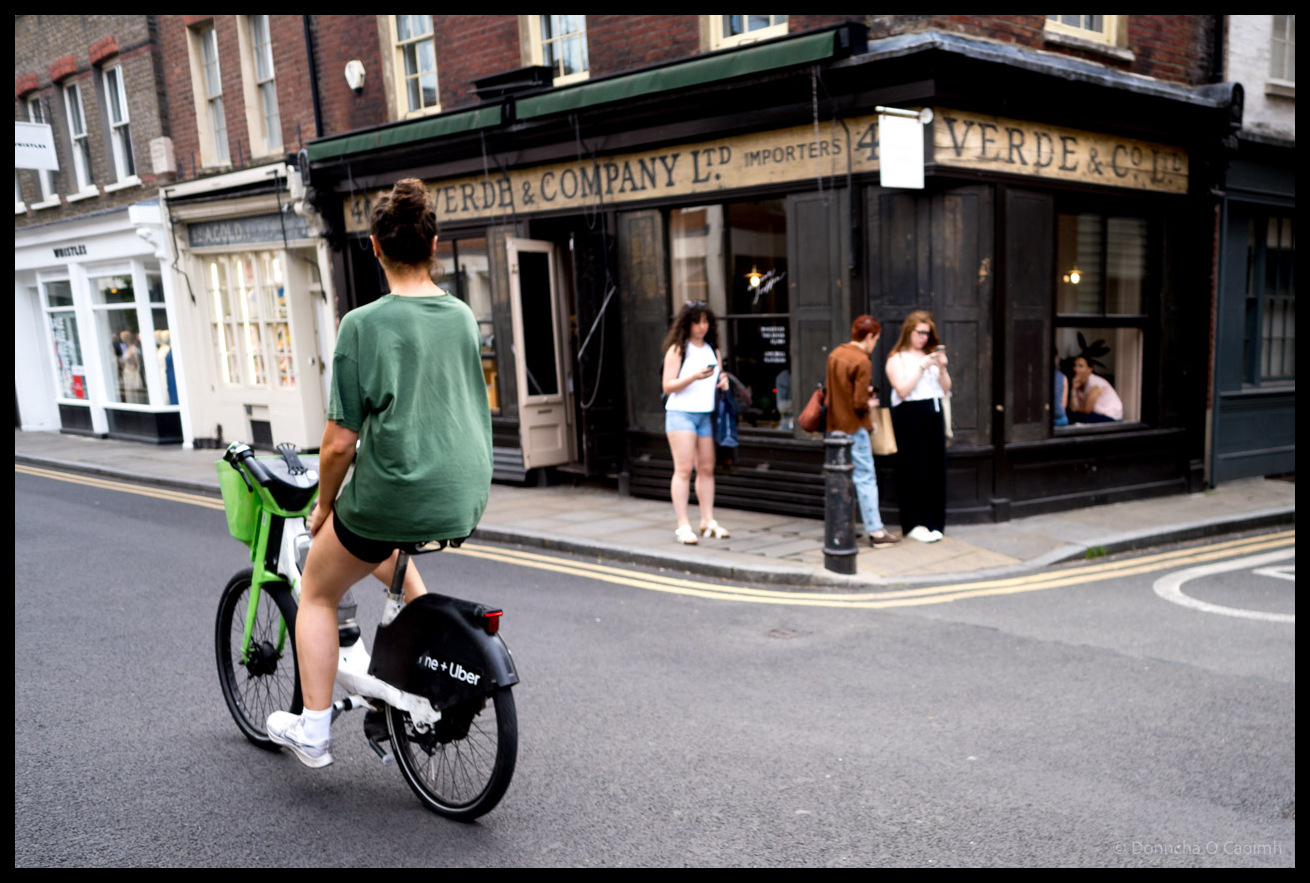
Verde Synchronicity
This is one of those delightful urban photography moments where colour, context, and coincidence align to create something more interesting than the sum of its parts. A woman in a green T-shirt and shorts, on an Uber bicycle with green basket, cycling in front of a shop bearing the name “VERDE & Co Ltd”. Verde…
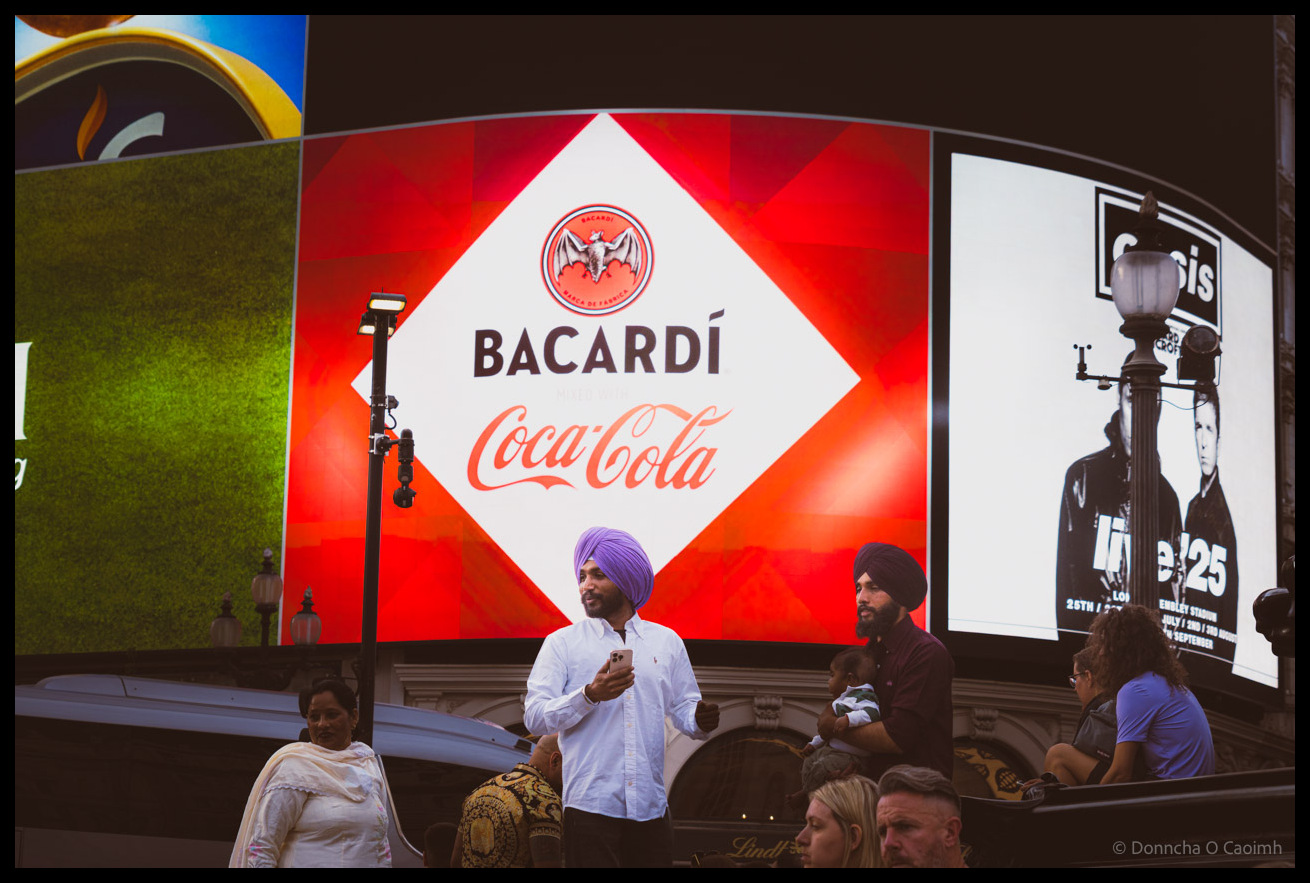
Global Advertising in Piccadilly Square
I visited London briefly during the summer with some friends and Piccadilly Square was one of our destinations. There were so many people from all walks of life gathered there it was a rich representation of life in the city. Tonight at Blarney Photography Club I gave a talk there about the trip with my…
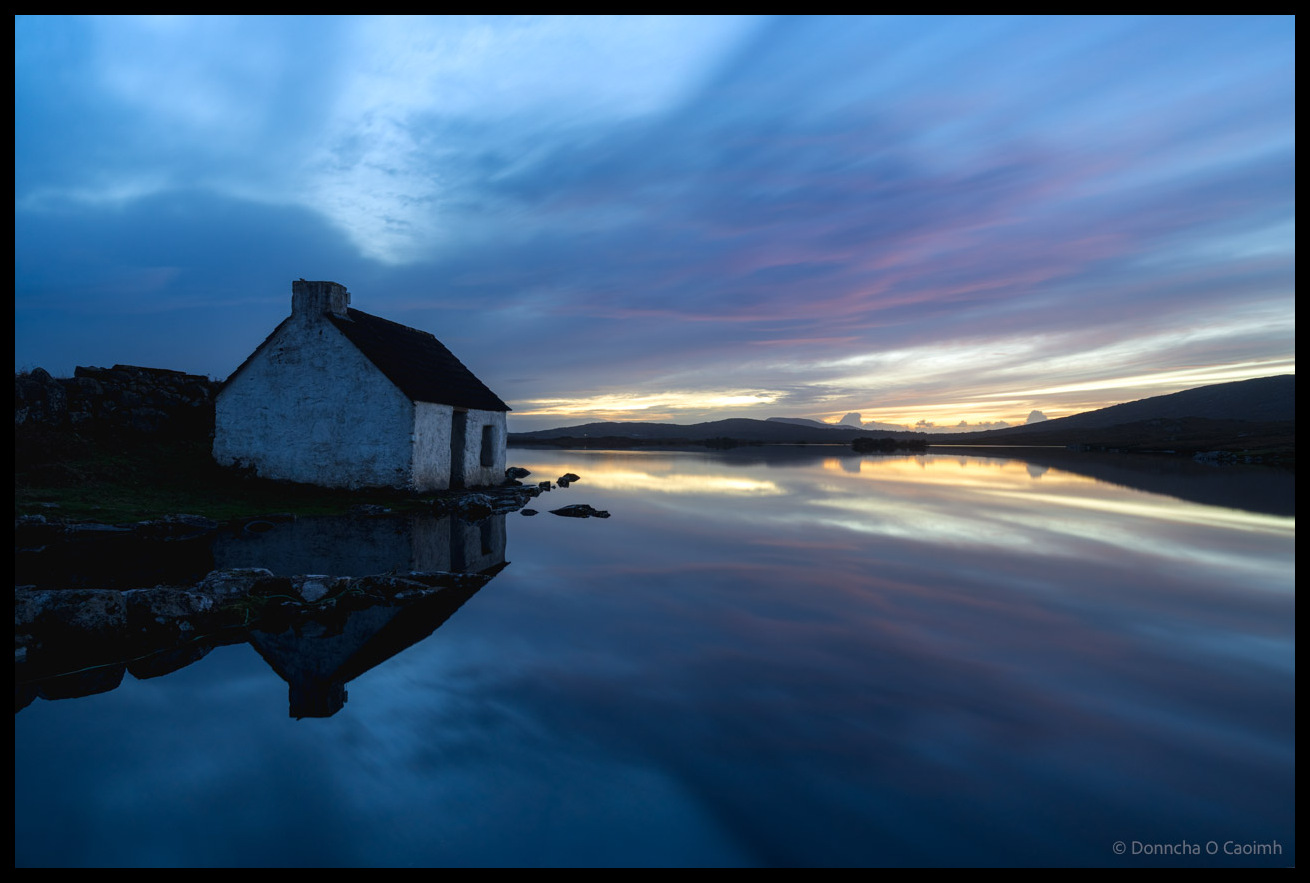
Screebe Fishing Hut at Sunset
My first time visiting the famous fishing hut at Screebe in Connemara was last night, when we were blessed with an evening without even a breeze to disturb the water. Unfortunately, there was an excess of low cloud, with a cloud bank at the horizon that swallowed the sun at the horizon behind the house,…