Lightroom Classic doesn’t always adjust time correctly

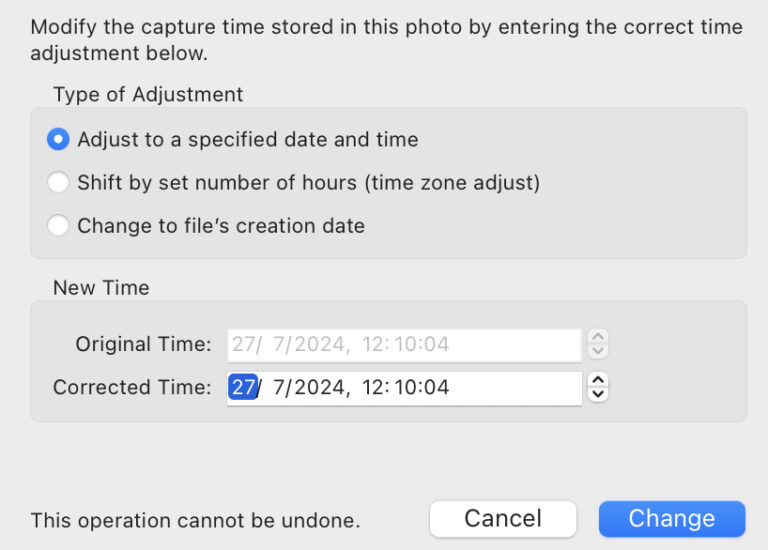
I can confirm that this bug still exists. If you change the capture time of a photo in Lightroom Classic it may not do it correctly. The time was wrong on my camera and I had to change 249 images this evening. As I went through them later, I noticed a few were out of order, when sorting by “capture time”.

When the time is changed, there are three fields that need to be modified:

  • Date Time Original
  • Date Time Digitized
  • Date Time

Most of the time all three are changed, but sometimes, only the first one is.

Attempts to change the time failed again and again, so I changed the sort order to “Filename” which works just fine, but it’s annoying me that there are bunches of photos in today’s photos that have jumped through time.

Anyone figured out how to fix this?

Dodge and Burn using Lightroom Masks

It occurred to me while watching a video by Nick Page on Photoshop’s Luminosity masks that Lightroom Classic can now do something similar with luminance range masks. It’s not quite the same and won’t be as powerful, but it saves jumping to Photoshop and creating a 100MB tiff file.

You could always dodge and burn with the brush tool in Lightroom Classic, and by using a Brush Mask you can still do the same:

  1. Create a brush mask.
  2. Brush where you want to dodge or burn.
  3. Adjust exposure.
  4. Repeat for different exposures.

By using a luminance range mask in Lightroom Classic I could select the shades of dark or bright that I want to apply the effect to. By subtracting with a brush, I could modify the shape of the dodge/burn mask to my taste.

Sure enough, someone had done what I wanted already and had made a video of it. For a global dodge/burn, a change of .50 exposure can be a little too much, but that depends on your image.

For extra points, make an inverted sky mask and intersect with a luminance range mask to apply the dodge/burn there only, leaving your sky untouched.

And finally, make a preset of it! Click on the “+” next to Presets while editing and then “Create Preset…”. Uncheck everything and name your preset. Click on your dodge/burn masks in Masking, and click on “Support Amount Slider” in case you’ve modified that and save your new preset. New masks will be created when you apply the preset to another image. You can modify the intensity of the change to suit the new image.

If you’ve added an inverted sky mask, your preset will find the sky in any photo you apply the preset to everything but that part of the image.

The new masking tools in Lightroom Classic are very powerful. They’re really worth learning!